Sunday, December 29, 2013

DKNY Be Delicious Fresh Blossom


Ever since I've heard about the DKNY Be Delicious perfume (green apple scent), I've always wanted one. But seeing as the price was out of my budget in perfume buying, I never had the guts to go all out and buy one.

I went on a trip with my family excluding my bro (exam time sadly for him), for 2 weeks during October to Macau & Hong Kong. I pretty much went crazy in Sasa seeing most of the products a lot cheaper than here in Aus, so the first thing on my list to buy was the DKNY Be Delicious.
But obviously I bought the Fresh Blossom perfume, reason being was that I smelt the Fresh Blossom when I was at Macau and I fell in love with the scent more, so when I went to Hong Kong I bought the Fresh Blossom at a Sasa near Langham Place.


It costed $576 HK ($82 AUD). I know you can get it cheaper here in Aus for around $60 during sales, but I guess it was an impulse buy.

Pink and white box packaging!

I absolutely love the packaging and how the button is at the top while the dispenser is on the side, it's so unique compared with the modern day perfumes. But the downside to it is that you cant use a Travolo or a refillable perfume bottle with it.
The bottom is also flat so it wont roll around if you leave it on a flat surface.


As for the scent, I'm going to be using trusty google to describe it. 

Heart Notes: Muget, Rose & Jasmine
Top Notes: Grapefruit, Cassis & Apricot
Base Notes: Blond woods & Smooth Skin Accord

But all I say is that it smells fresh.

It's now my go-to perfume, I've been using 2 sprays of it whenever I'm out and lasts around 5 hours before it dies down. 
I will definitely repurchase this when I run out.

Wednesday, December 25, 2013

Lanolips Lip Ointment with Colour in Rhubarb


I purchased this a while back and I somehow ended up having it with my lip products abandoned after a couple of uses. It was a 'meh' product for me but I decided to give it another go.


I've heard a lot about the Lanolips products and all the raves, but the prices were puting me off in purchasing their lip ointments. I found the Lip ointment in Rhubard for only $2 in Priceline (in a bargain bin)! Yes 2 dollars. It was the last one as well, so of course I had to buy it.


I found the texture to be thick but not sticky. It felt a bit like lipgloss, and if you dont know me well, I really don't like lipgloss. Which is probably why I didnt use it a lot in the first place.


It did make my lips a shade darker, but wasn't too noticable.
When I do use it, I only use it before I go to bed or randomly through the day which defeats the purpose of the color.
I find that when I apply it to my lips it lasts 1-2 hours, after around 30 minutes to an hour the ointment starts to look more like a lip balm rather than a gloss which is what I like about it.


But in terms of it being moisturising or not, it does work but it doesnt really wow me compared to the Lucas Papaw Ointment.
I wouldn't repurchase this but considering I got it for $2, I dont regret buying it.


Daiso Nose Pack


 Daiso is known for selling a range of products for only $2.80 (in Australia that is), storage, snacks, stationary, toys, kitchen supplies, makeup and many many more.
The only things I really buy there is storage tubs and their puff and sponge detergent which I think mostly everyone in the beauty community knows about.
Lucky for me I live 5 minutes away from a Daiso store so I popped in the makeup section and found the Daiso Nose Pack.
I actually knew about this product awhile ago after seeing some review on a Daiso pore strip that was black. but sadly for me I couldnt find it in my Daiso store, only the white pore strips (have no idea what the difference is though, besides the colour)


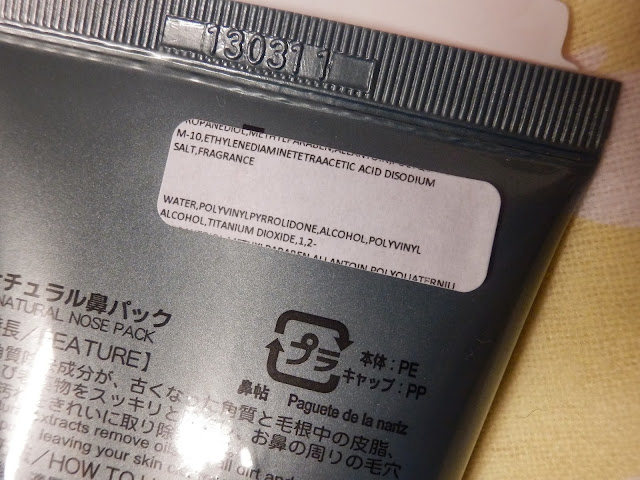
 Being the only pore strip I know that is applied directly onto the nose, I had no idea how to apply it. At first I used my finger but it was way too messy to deal with so I ended up using a q-tip/cotton bud to apply it with (cutting it in half and using the plastic end).


If I could give a word of advice I would not recommend putting a thin layer but instead a thicker amount on your pores. But not too thick that the product comes dripping down. As the picture below shows, the thinner the layer is the harder it is to peel off, and I found it hard to remove with water after  (a makeup wipe works well though).
I like to use this around once every 1-3 weeks, if I can be bothered.
I found this product to be too time consuming compared to actual pore strips like the Biore Strips.
I mean the application time would take around 1-3 minutes then the waiting time takes forever depending on how thick you apply it, it usually takes me around 20-30 minutes for it to fully dry. 

The after effect
 It does dry out the nose when you peel off the strip which is a down side.
But it does the job well.


For $2.80 I would consider repurchasing but I think for now, I'll just stick with my Biore strips.

Tuesday, September 24, 2013

Too Faced Shadow Insurance


Having oily lids can be a pain especially with all the eye makeup never lasting an hour without creasing, fading or even melting off. I had a school formal awhile back and decided that I might as well invest in an eye primer just incase any eye-makeup-mishaps happen. 
I was tossing between purchasing the Urban Decay Primer Potion or the Too Faced Shadow Insurance but of course us Aussie bloggers know that we cant get Urban Decay unless purchased online so I decided to just get the TFSI (I got mine at Kit Cosmetics for $26.95). I had my doubts about this product so I was hesitant to buy this, but after 5 hot sweaty hours of dancing, my eye makeup actually stayed in place.


The packaging is in a squeeze tube, which is more hygienic compared to the doe footed applicator and is also a plus since you can control the amount of product you want!
\When I first opened it, I found that a small amount of liquid comes out first then the product, so it helps to have a tissue or paper towel near you if you plan on getting this. 
Also the opening is quite small which is perfect because only a little goes a long way! Not even a pea size is needed, only a small blob is what I use for my lid and the lower lashline. 


When I applied this on my lid, the texture felt odd to me, it had a very liquidy/oily feeling to it (kind of like moisturiser) , which is why you dont need a lot since it spreads out smoothly. But you get a matte base once you finish applying the primer.
I found that it was just a tad harder to blend out my pencil eyeliner compared to having no primer, but it did make it last a heck lot longer so I really have no complaints.


Cheap Steals!


Being the typical self, I always end up going to the beauty section of the supermarket after buying the groceries. Just in case any items have gone down in price for clearance or if any sales have started I will always go down the aisle looking at every single product. 
I was shopping at Coles yesterday and found a few products which had been marked down and a few products that were just cheaper than it's original price.
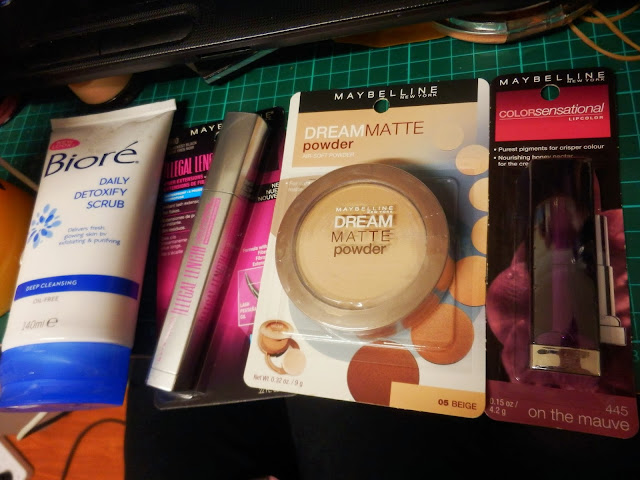
I would like you to first guess the price of the products below then continue reading.


Biore Scrub: $2
Maybelline Illegal Length Mascara: $3
Maybelline Dream Matte Powder: $3
Maybelline Color Sensational Lipstick: $3

I actually picked the Biore scrub at the clearance shelf, there was a lot of other skincare products which were under $5. There was the Invisible Zinc products for $4 which I was tempted to get but I had to limit myself. 
I then went to the beauty section of Coles and I saw that Maybelline was having a buy 2 get the third free, then I saw a few products with their prices highlighted, they were under $3! I squealed on the inside when I saw it, 2 of their mascaras were $3 but IU just picked one of them. Then I saw the powder for $3 then there was a few lipsticks which I didn't really want but I picked up a mauve colour just to give to my mum, I mean it was for free so why not?! 


Did you pick up any bargains this week?!


Sunday, September 8, 2013

Daiso Cleansing Pad


Having those extra dead skin cells hanging off my face has always been one of my beauty pet peeves, especially during the colder weathers (thank god it's nearly over!). I've always been a BB cream type of girl but I always put off using it, knowing that I will have to suffer with the fact that it will emphasis on my dry areas.


I remember seeing the Sasatini Facial Cleaning Brush and all the raves it was getting, but when I asked my dad to buy it from Sasa it was all sold out. So I decided to just go get the one at Daiso, I was actually expecting it to not work at all but it actually works like a charm.


The only reason I thought it wasnt going to work was because of the small sample at the top of the packaging, (it lets you get the feel of it before you buy it). It felt too rubbery and felt like it would pull my skin everywhere, also compared to the Sasatini one the bristles were too close together and reminded me a lot like the fish eggs on my sushi.

Teardrop shaped


If you havent realised, the instructions on how to use this does not make sense. I mean "You please paint the face entire surface with facial cleansing cream." that just made it look 10 times worse than it actually is, the quality and all.


The back

So at first, I had no idea how I had to hold it then I realised the thing at the back and the gap at the bottom had something to do with how it was supposed to be held. I didn't take a picture of it and I only realised when I used it, the gap at the bottom is supposed to be where you put your fingers in then you use your two fingers to hold the fountain thing at the back. Yeah its hard to explain but you just have to play around with it.


I pair this cleansing pad with my Hadalabo Tamagohada Daily Facewash and gently rub it on my face in circular motions. So like I said before, how I thought it would feel rubbery and pull on my skin, it difinitely does not do that. It's very gentle on my skin (but it does state that this isn't for people with sensitive skin so just letting the people with sensitive skin know!) and I don't have sensitive skin.
I found that this did exfoliate most of my skin but not all. I still did have a dry patch of dead skin cells between my eyebrows but the dead skin cells around my cheeks did lessen, which was better than nothing!.

I'm still using this after weeks and the results are still the same, so if you do suffer from a lot of dead skin cells hanging on your face I would suggest this as it is only $2.80 (quite a bargain)

I purchased this with my own money and this is all my honest opinion.

Wednesday, July 3, 2013

The New Batiste Cherry App!

Batiste has recently released a Facebook app yesterday! [link to the app here]
It lets you style your own look for a chance to win a $1000 Market HQ Wardrobe. Pretty simple if you ask me.

I decided to make my outfit something that I would wear. My style usually consists of very casual clothes, the clothes you get to choose on the app is quite limited but I just worked with what I had.
Top:  White tank top
Bottom: Black skirt
Accessory: Hex Nut bracelet
Bag: Brown leather backpack
Shoes: Black boots.
Though it's currently winter in Australia, I would probably wear this outfit during the warmer weather.
Just with a plain white tank top tucked in a black skirt is one of the easiest ways I like to wear my skirts. I like to pair it with some boots. Then for the accessories I usually put on a long necklace or a bracelet. I also feel like a backpack is the way to go instead of a handbag, for a more casual look.

So I encourage you guys to check this app out, enter the competition and just play around with it. It honestly reminds me back in the days where I used to play Stardoll (anyone else used to play that too?).


I also have a Batiste Cherry Dry Shampoo review coming up soon! Which is my HG for those oily hair days!

Monday, June 24, 2013

Maybelline Hyper Glossy Liquid Liner in Black


Being the eye-liner fanatic that I am, I'm always on the look out to try out new eyeliners.
I'm also still trying to find the ultimate eyeliner to with-stand my oily lids and the watery-ness at both ends of my eyes. 
I've already tried quite a few liquid eyeliners and most have been disappointing when it came to withstanding my watery eyes, so when I bought the Maybelline Hyper Glossy Liner, I had a feeling it would also be the same... and sadly I was right.


Can I just stop to say how much I love the pink metallic writing against the black?! 


I purchased this at Mychemist for $6.97 during it's 50% off sale.
The thing that had drawn me the most to it was it's brush. It's nothing fancy, but I like to aim for brushes that can do thin lines and thick lines. There are days where I rock the think liner and there are days where I rock the thin line so those eyeliners are preferable.


The brush
The brush really reminded me of the Rimmel Glam Eyes. But a teeny bit thicker.
Since I'm used to applying eyeliner, I cant be the judge of whether it's easy to use or not but it was easy to use. When I wiped the excess eyeliner off on the bottle, the brush turns into a flat applicator which helped apply the eyeliner in one straight line (in my experience though). It's probably the best eyeliner brush I've used so far.

L-R: Dollywink, 24 Hour K-Palette, Rimmel Glam Eyes, Lancome Artline, Maybelline Hyper Glossy
Wish Flash
As you can see in the swatches, it's very glossy and very pigmented!
I was surprised at how pigmented it was. 
But when I had it on my lids, it wasn't as glossy and didn't seem as pigmented, but it was pigmented enough for me to be content with it.

Clockwise: First applied, rubbing test, after 5-6 hours, close-up of the end.
I like to extend my eyeliner around 1 cm from the end of my eyes, so I have to create another line from the ends of my eyes to the tip of my eyeliner, which is the most watery part of my eye. ( AKA the danger zone).
From the picture above, the eyeliner didn't last on the "danger zone" after 5-6 hours, it pretty much separated. I also found that after 1-2 hours with it on, it made a small trail of eyeliner coming from the ends.
But if I look on the bright side, it would be a really good eyeliner if I dont use it near the watery space. 
I found that it didnt smudge when it was raining (unlike the Rimmel Glam Eyes) and it creates a really precise wing.
So I would assume that it would be a HG eyeliner  for most people, but for me it just didnt win me over.