Showing posts with label eye. Show all posts

Saturday, November 17, 2012

Rimmel London The Max Bold Curves Mascara - Black


Got this mascara in a part of the Rimmel Xmas 2011 Pack (post here).
Rimmel Mascaras honestly never caught my eye (besides the bright colours), I was always interested in the Maybelline mascaras so I was happy to get it in the gift pack. 
I needed to try out some new mascaras, which is pretty hard for me to find the perfect mascara. I like to look for non clumpy, flake free, holds a curl, lasts all day and easy to take off mascaras. (I have high expectations in my mascaras).

Back of the tube
Got the colour in 001 Black


Claims to give 'Big, bold lashes in a flash, Exponential Volume and Lift Mascara.

The wand


The wand really shocked me when I pulled it out of the tube, it was pretty big. The curved shape was supposed to 'curl' and lift your lashes, which never works in my books since I have stick straight lashes, but the curved shape was big enough to cup majority of my lashes in one sweep.
The formula was quite drying and clumpy on the bristles which you would have to wipe off the excess. 
I am no mascara expert but the brush itself seemed like one of those cliché curling/volumising brush.

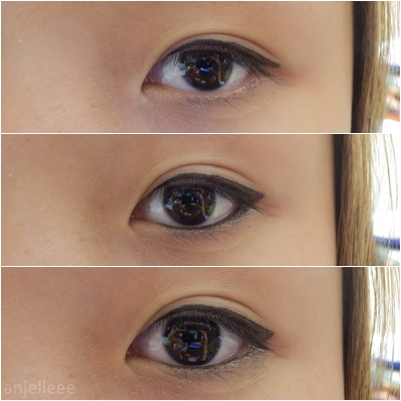
Bare lashes, curled lashes, one coat of mascara...droop
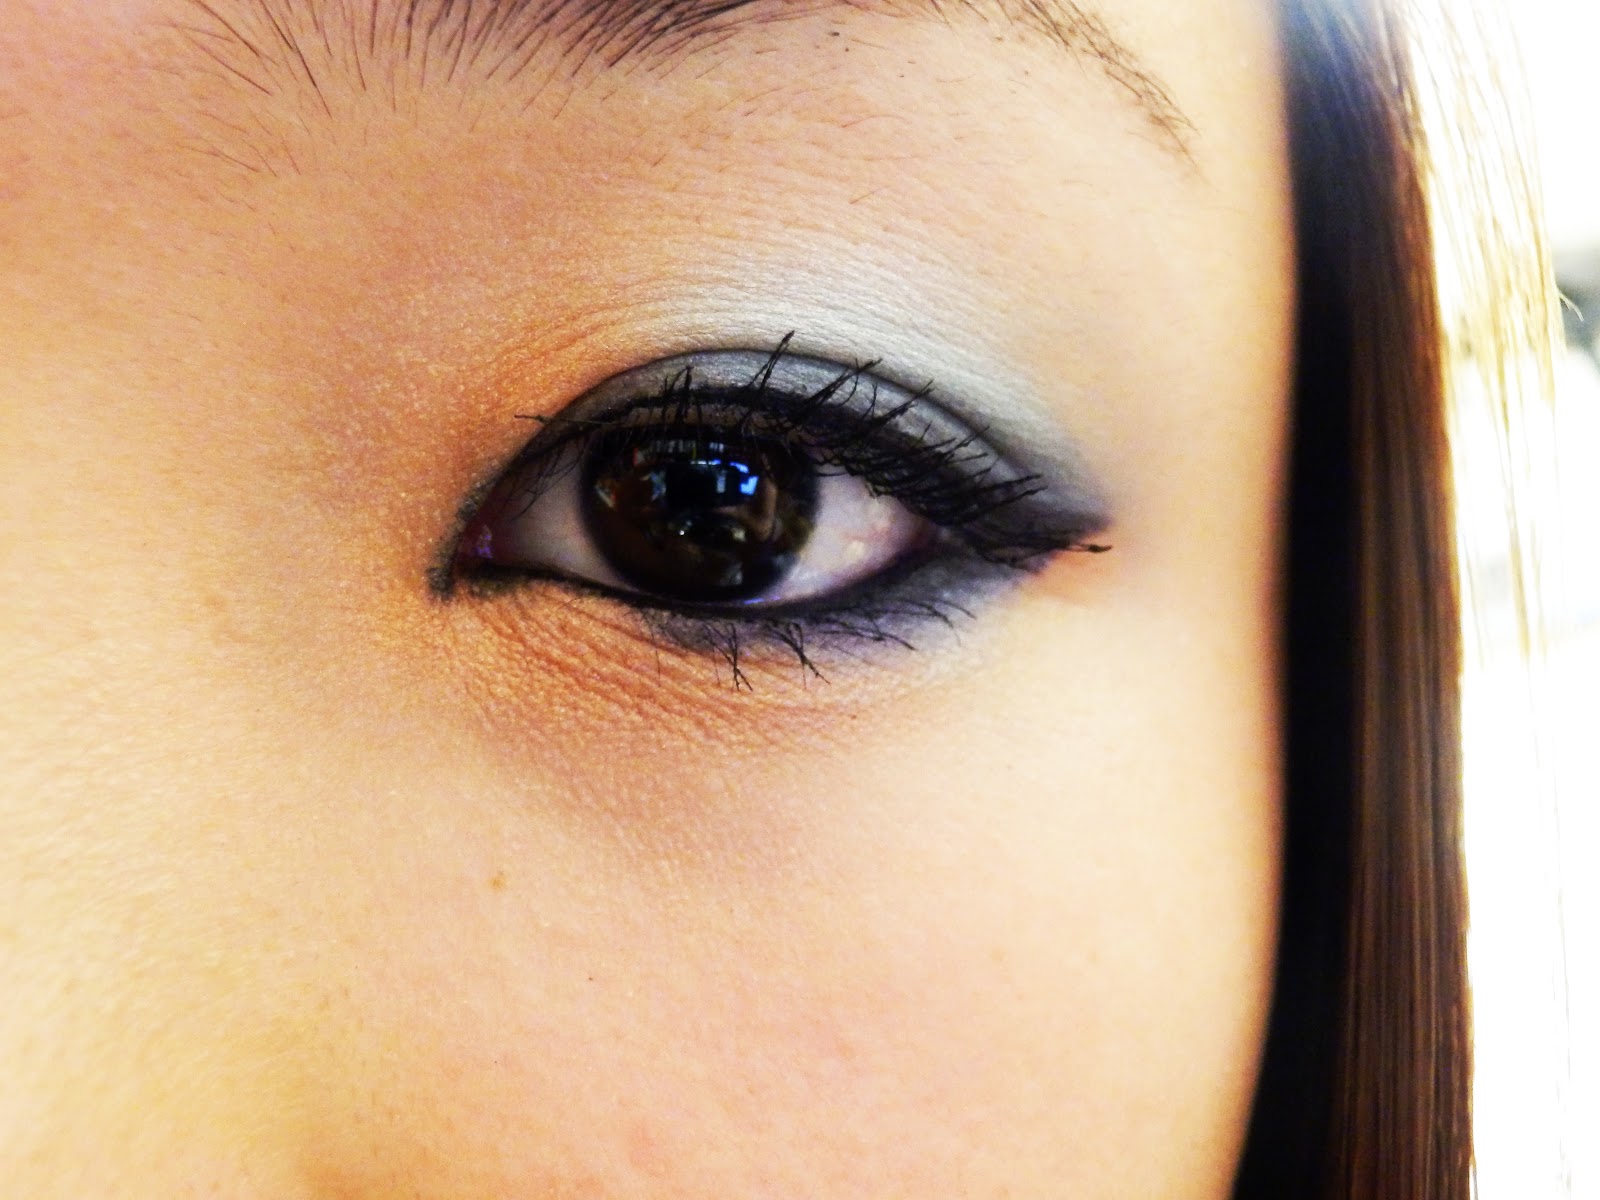
Sad to say I didn't test the lasting power since I gave this mascara away to my friend due to the fact that it didn't hold a curl. After a few minutes it started to droop. Though I did like how it made my lashes look, it wasn't that clump, lengthened a tiny bit and volumised a tiny bit, looked very natural and it didn't flake!
I would'nt repurchase this but for those who would like to try this mascara out you can get this at Priceline for $15.50 or any store that stocks up on Rimmel products! :)

Birds eye view

Natural Looking


Wednesday, October 24, 2012

HyunA Ice-Cream MV Eye Makeup


Recently HyunA came out with a new MV for Ice-Cream, to be honest I don't really like the song but HyunA was so pretty in the music video! 
She had different looks for different scenes and the eye makeup I did was when she was by the icecream truck. There were a few other makeup looks but this one stood out to me the most!


The stars shows the eyeshadows I used for this look.
 For the eyeshadow I'll be using my 48 Eyeshadow Pallette by DB which my friend got me as a birthday present last year! I actually rarely use it since I don't use shimmery eyeshadows or bright colours. Starting to use it more now.

Also if you're wondering, I'm using my Ecotools Eyeshadow brush to apply most of the eyeshadows and I'm using a gel eyeliner brush that comes with the Maybelline gel eyeliner to make a wing.


Step 1: Apply your base

Using my NYX Jumbo Eye Pencil in "Milk" I applied it all around my eyes blending it up to the crease.


Step 2:  Orange eyeshadow 

Using my eyeshadow brush, mixing and applying colours 1&2 to the inner corners and blending it up to the crease. Afterwards using the tip of the eyeshadow brush to extend the orange eyeshadow halfway on the lower lashline.


Step 3: Light Blue eyeshadow

Mixing colours 1&2 together to create a light blue shade. I applied it all over the lid and up to the crease, blending in with the orange to create a transition effect.


Step 4: Dark blue eyeshadow

Mixing colours 1,2& a bit of 3. Using the tip of the eyeshadow brush, apply the eyeshadow to the outer lower lashine and extending the line towards the lighter blue shadow.


Step 5: Eyeliner

Using my Rimmel Glam' Eyes Professional Liquid Liner, lining my eyes except stopping at the end of where my lashes are.


Step 6: The wing

Using a black eyeshadow and a small eyeliner brush, make a wing that extends from the end of the liquid eyeliner then straight across then connect the tip to the bottom lashline.


Step 7: Pencil Eyeliner

Using my Milani Liquif'eye black pencil eyeliner, line the entire waterline then the inner corners.


Step 8: Mascara

Curling my lashes then applying Maybelline The Falsies to the top and bottom lashes.


And then you're finished! 
I was going to make a video version of this tutorial, except I still havent found the right position to put my camera and film, so just wait until I buy a tripod and one day I will start making beauty videos!


Saturday, October 13, 2012

Essence Coverstick- Matt Beige


After seeing Missglamorazzi on Youtube rave about this, I really wanted to try it out!
Costed me $3.95 at Priceline, I think it had around 4 colours and I'm not the type of person who likes to try out the colours, I usually just buy one and hope for the best (not a good idea). But luckily this did suit my skin colour. I chose the one that was the lightest colour out of the bunch.


States that "the coverstick reliably conceals skin imperfections with a fine matt finish. the formula with allantoin calms the skin. ideal for all skin types. dermatologically tested." 

The ingredients. 
So I did a bit of research on 'allantoin' and apparently it is actually really good for the skin. Allantoin is odorless, non-toxic and non allergenic. It is moisturising and softens the skin. It also has a few skin healing properties. Now doesn't that make you want to get this? 

Contains 5g
So the symbol with the tub and lid and 12M means that it has a good use of 12 months before I have to throw it out.

05 Matt Beige

When you take the stick out of the cardboard packaging it looks like this. Reminds me of a lipstick. It's not very eye-catching but very simple.


It contains about 3cm of the concealer stick. Also really looks like a lipstick! 
This is the first concealer stick I've used so I'm not concealer expert.


Just going to let you guys know that you should never try our your concealer on your hands since they will be   very diferent in colour. My face is lighter than the rest of my body, pretty weird if you tell me.


When you apply is quite creamy and pretty easy to blend, I'm very happy with this concealer, since it gives a light-medium coverage. Covers the dark tinge around my eyes! 
But the only con I have about this product would be, during the colder days the stick will be harder to apply and also harder to blend. I only use this during warmer/hotter days. Oh and it also goes in the cracks of my undereyes so I try to make sure it isn't too dry under my eyes (I have conbination skin).
I would definitely buy this again, I mean only $3.95 now that's a bargain!


Monday, September 24, 2012

Rimmel Soft Kohl Eyeliner Pencil - Jet Black

After hearing so many raves on this and seeing so many beauty gurus using this on their waterline, I was always wanting to buy this, since I am still looking for my HG black pencil eyeliner for the waterline.


I actually got this eyeliner from the Rimmel Xmas 2011 Pack which should be discontinued by now but you can also get this eyeliner at places that sell Rimmel stuff, which will cost around $8 unless it's on sale.


Got the colour in 061 Jet Black, luckily it was the one I wanted!

The tip will be much sharper when you first get it, I just used it.
On the Rimmel website it claimed that the eyeliner was:
Soft, smudgeable colour with an improved staying power.
Soft: Yes
Smudgable: Yes
Staying Power: No
I'll explain the staying power later on.

Comparison of Milani and Rimmel
As you can see, Milani is still the most pigmented black eyeliner I own but if you keep building up the colour for the Rimmel eyeliner it does become a deep black.

The staying power after 3 hours.
Okay I did cheat a bit, I put on the eyeliner at home and left it on to see how long it would last for and it only lasted for 3 hours before the eyeliner started to melt in the inner parts due to my watery eyes.
I also did use the eyeliner on the top lashline (not in the picture) to use at school since I had no liquid eyeliner to use and it gave me panda eyes at the end of the day sadly. (I have extremely oily eyelids so there's no surprise there)

I wouldn't repurchase this but it might work for the less oily eyelidders!
and I am still in the faze of trying out all black pencil eyeliners out there so more eyeliner reviews to come!


Saturday, September 15, 2012

Maybelline Color Tattoo-Tough as Taupe


I'm pretty sure most people have heard about the Color Tattoos and its amazing "24hr wear" and the range of colours. I personally really wanted the taupe color seeing as though I have never owned a taupe eyeshadow and it was also non shimmer/glitter and I have a thing for matte eyeshadows!


Purchased this at Priceline while it was on sale for $9.56!
Got the one in 35 Tough as Taupe. I heard some other countries had different names and packaging to the Australian one? 
Contains 14oz/4g, quite a lot of product for my use.


The bottom of the Color Tattoo has the sticker on it. I like how it's in a jar form as it is a lot easier to store in my makeup drawer. But I found that the bottom of the jar was kind of wasteful since it was just 1cm of emptiness that could've been filled with product or just removed to make the jar a lot more smaller.


In flash
Accidentally shoved my fingernail in it... :(
The colour looked like a dark taupe colour, its great as an overall lid color or a base aswell!
I use it on my lids and sometimes with some sheer black shadow on the outer corners.


When you dip your fingers in in the product actually looks more darker than what was in the jar. 

As for the product it did crease a very very small bit on my lids (I have very oily lids so no surprise) after around 6ish hours, which is amazing for my lids, if you have normal lids it would definitely stay on your lids for along time, maybe 24 hours. But the creasing I didnt mind since it isn't noticeable unless I close my lids. (the skin above my crease fold over my lids so my eyelid is pretty small), but when I used this product on my lower lashline it faded and smudged. 

As for the pigmentation it does look like what it looks like once you dip your fingers in it. It's also build able and dries matte! 

Swatch:


I would give this product a 4.5/5, it didn't last on my lower lashline sadly.
I would definitely repurchase this though!

Tuesday, September 4, 2012

Essence Kajal Eye Pencil- Neon Sweetie


Months ago I went shopping at Target and never got to do this review, since I never ended up using this eyeliner daily, but I did use it one day while finding a new eye look.
So Essence is usually found at Target and Priceline, I found this at Targets bargain basket filled with Essence products, this eyeliner was $1 so I bought 2 since my favourite colour is yellow and I love eyeliners!
It claims it has high precision application and is long-lasting.

I found it pretty odd how they were the same colours on the packaging but on the product one was a lighter yellow than the other. 

Pros:

-Pigmented
-Soft
-Easy to apply
-Colour is buildable

Cons:

-Didn't last long, if you touched it it would fade almost immediately!
-The colour is discontinued I think, I can't find the colour anymore.


Swatch: